

Parametric Door Block – Case #004

Milton Chanes • August 14, 2026

Share this article

Parametric Door Block – Case #004

Although there are some minor differences between these programs, the steps and concepts explained in this tutorial can be applied in virtually the same way to all of them. If you don't have a license for any of these programs, you can download the trial version of ARES Commander and put everything you learn here into practice. Download ARES Commander


https://www.graebert.com/cad-software/download/ares-commander/


Note: ARES Commander is available for Windows, Mac, and Linux.


You can also find more tutorials and similar examples on my feed and on my website, www.miltonchanes.de, in the BLOG section.


In this tutorial, we will start with the block we created in a previous tutorial. If you haven't watched it yet, I recommend starting with that one, as it will help you follow the steps we will cover here more easily. It is available in several languages. Just make sure to select the tutorial identified as Case #003: https://www.linkedin.com/pulse/door-block-automatically-cuts-walls-case-003-milton-chanes-giolf/


The tutorial begins by editing the existing block, which already includes a WIPEOUT. This element allows us to visually hide the wall behind the block, creating the effect that the door automatically cuts through the wall when placed over it.


The WIPEOUTFRAME variable allows us to control the visibility of the WIPEOUT boundary using the values 0 and 1. In this case, we need the frame to be visible so that we can identify it and work with it while editing the block.

I’m going to avoid going over the basic concepts and focus only on what is important for this particular example.

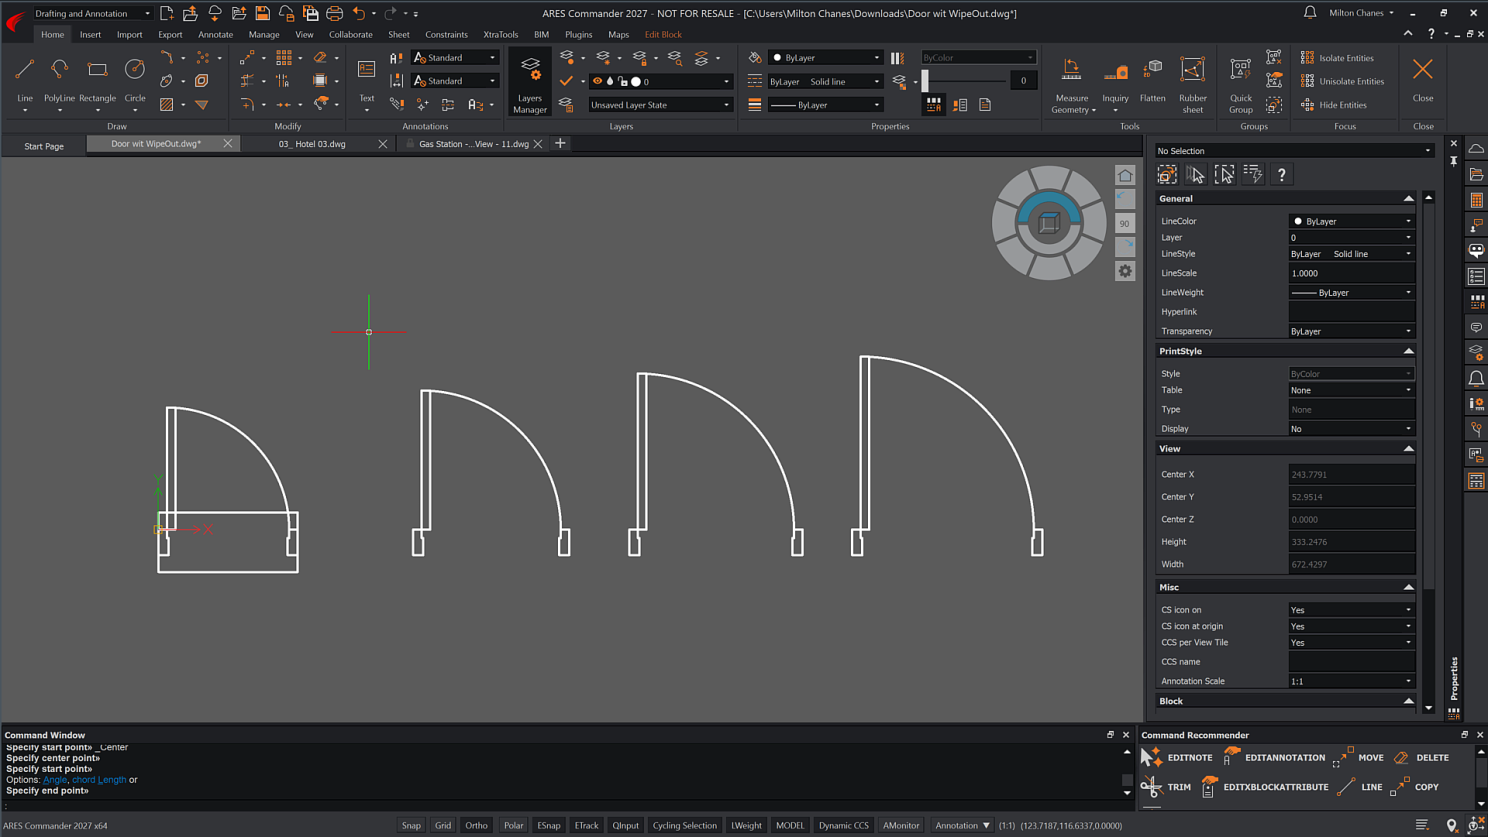
In this case, I have created four door sizes. The frame maintains the same proportions and adapts to each one, while the door leaves have widths of 72, 82, 92 and 102 cm. If you look closely at the frame, you will notice that it has a small 1 cm “tooth” on each side. This means that the resulting widths of the closed doors are 70, 80, 90 and 100 cm, respectively. These are standard dimensions commonly used in Southern Europe.


In the image, you can also see that, for now, we have only one WIPEOUT created: the one that was originally part of the block developed in the Case #003 tutorial mentioned above.


Door Block that Automatically Cuts Walls – Case #003

https://www.linkedin.com/pulse/door-block-automatically-cuts-walls-case-003-milton-chanes-giolf/


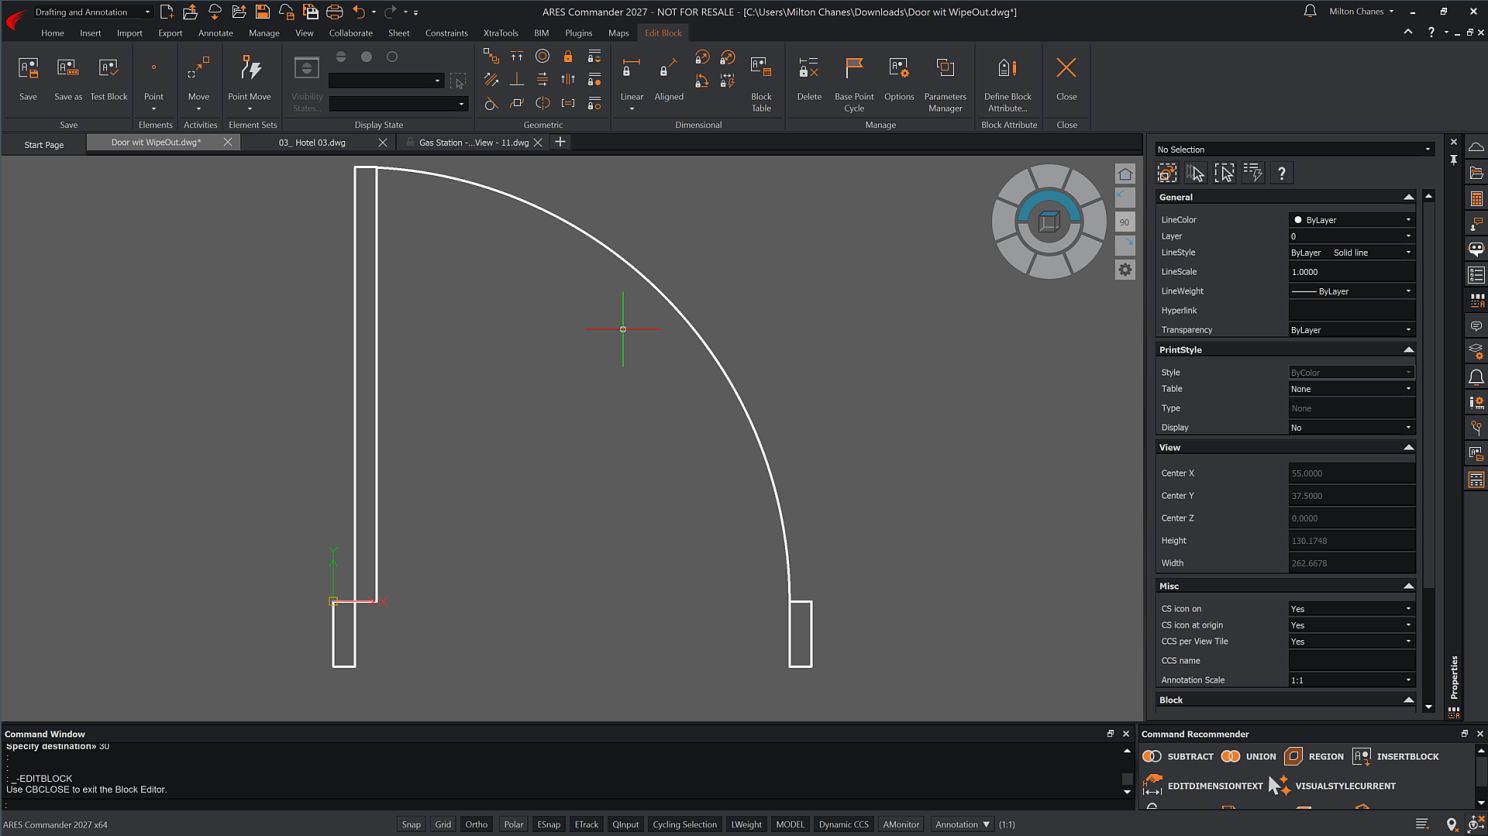
In the video, I start with a very simple task: changing the color of the arcs that represent the swing of the door leaves to gray. The idea is simply to show that, within a block, entities behave practically the same way as when we work with them outside the block.

We know that we are inside the Block Editor of ARES Commander because the EDIT BLOCK tab is activated, and the background of the drawing area also changes to the characteristic gray color of the block editing environment.


The first important task in this tutorial will be to create the Visibility States. Since we have four different door sizes, we will need to create four visibility states.


Pay close attention to the objects I select in the video. You will notice that I deliberately leave one of the frames unselected. This is because that frame can remain common to all Visibility States, so we don't need to include a different version of it in each state, at least in this example.


Pasos para crear los Visibility States


  1. After selecting Elements, we select a grip that we will use to control the visibility states.
  2. Next, we select all the entities that will participate in these states. This selection can be modified later if necessary. In this example, notice that I leave some of the frames out because we don't need them to be part of the Visibility States.
  3. From the Visibility States dialog box, we create the four states corresponding to the four door sizes.
  4. We select one of the states and begin hiding the entities that should not be visible in that particular state. We repeat the same process for each of the four states.Después de elegir Elements, seleccionamos un grip que utilizaremos para controlar los estados de visibilidad.


Remember also the function of the three main icons:


A) Show all entities from all Visibility States simultaneously.

B) Make an entity visible in the current state.

C) Hide an entity in the current state.


In this way, each Visibility State will display only the corresponding door, while the common entities can remain visible in all states.

Once the entities have been assigned to each Visibility State, we can delete those that we no longer need to keep. In the video, you will see that I am mainly referring to the additional frames, which are no longer necessary.


Next, we need to place each door in its final position. To do this, we simply use the Move command. While performing this task, we need to switch from one Visibility State to another so that we can correctly position each of the four doors.

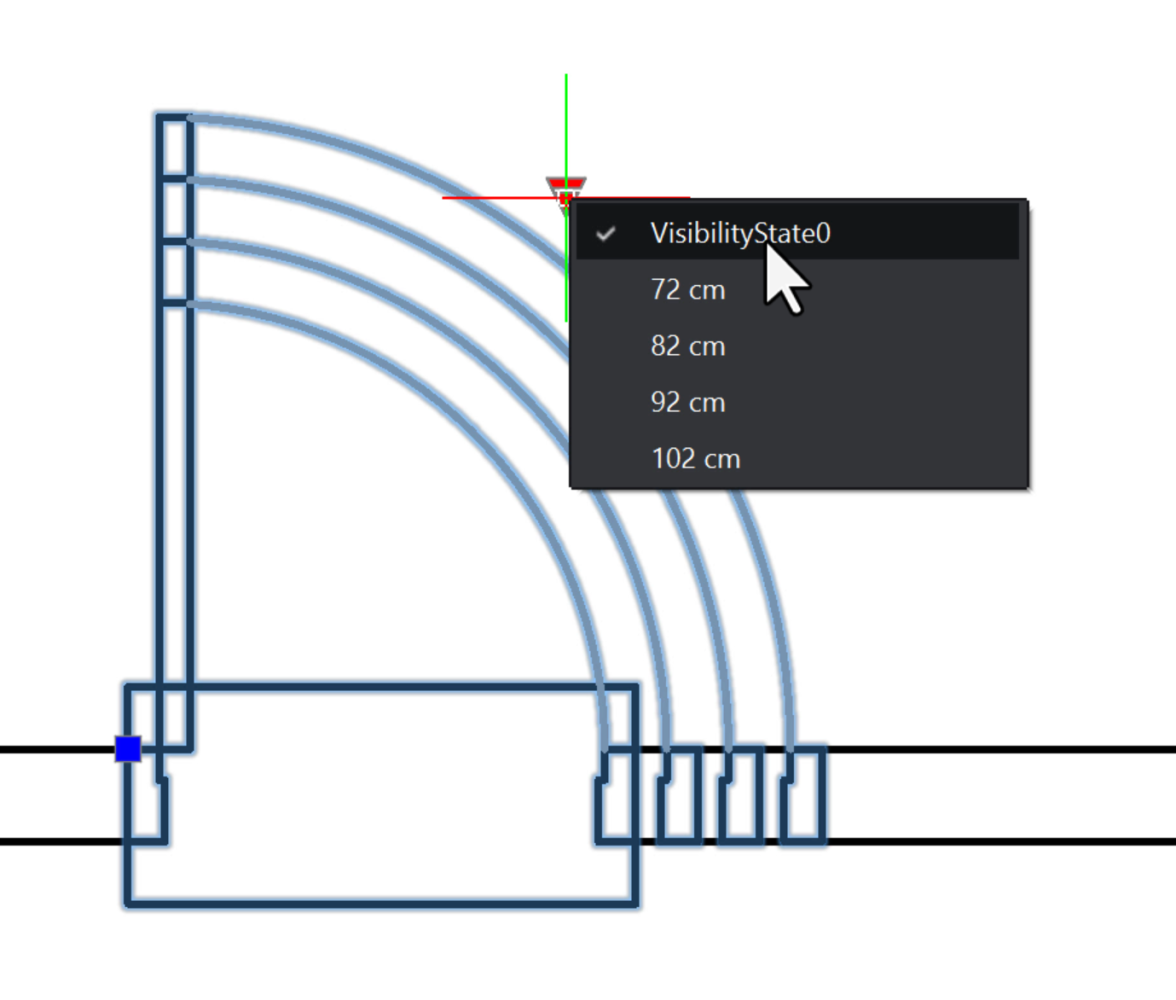
At the end, all the doors will be positioned over the same frame. Depending on the Visibility State we select, we will see one door or another.


In the video, I close the block after saving the changes simply to show the current state of the exercise. At this point, we have still kept an additional Visibility State that allows us to see all the doors simultaneously. This state can be useful while we are working on and testing the block, but it is only temporary and should eventually be deleted.


The first thing we will see in the next video is the removal of the additional Visibility State that we had temporarily kept so that we could view all the doors at the same time.


As we already confirmed in the previous video, switching between the different door sizes works correctly, but a problem appears: the WIPEOUT does not automatically adapt to the new size.


I should mention that there are other ways to solve this situation, especially when working with doors or windows whose size we want to modify using grips. However, that will be the subject of another tutorial. In this case, we are working with four specific sizes, so the simplest solution is to use a different WIPEOUT for each door size.


Therefore, we need four WIPEOUTS.


Since the difference between each door size is 10 cm, in the video you will see that I copy the existing WIPEOUT and use Stretch to progressively create the different variants.


The next step is to assign each WIPEOUT to its corresponding Visibility State. To do this, we will use the selection icon that appears next to the activity name, in this case Visibility 1. Basically, we just need to follow the same steps shown in the video. Once this stage is complete, we need to move each WIPEOUT to its final position and, very importantly, make sure to place it behind all the other entities in the block.


In the video, I save the changes and test the result. Now, every time we change the door size, the opening that hides the wall adapts correctly. However, we can still see the WIPEOUT boundary. To solve this, we use the WIPEOUTFRAME variable again and change its value to 0, so that the boundary is no longer visible.


Note: It is true that I have not yet performed this final step in the video. The reason is simply that we still need to add more actions, and for that, we need the WIPEOUT to remain visible. If you have already hidden it, you will need to make it visible again by setting the WIPEOUTFRAME variable back to 1.

Now we are going to make the door capable of flipping to the opposite side.


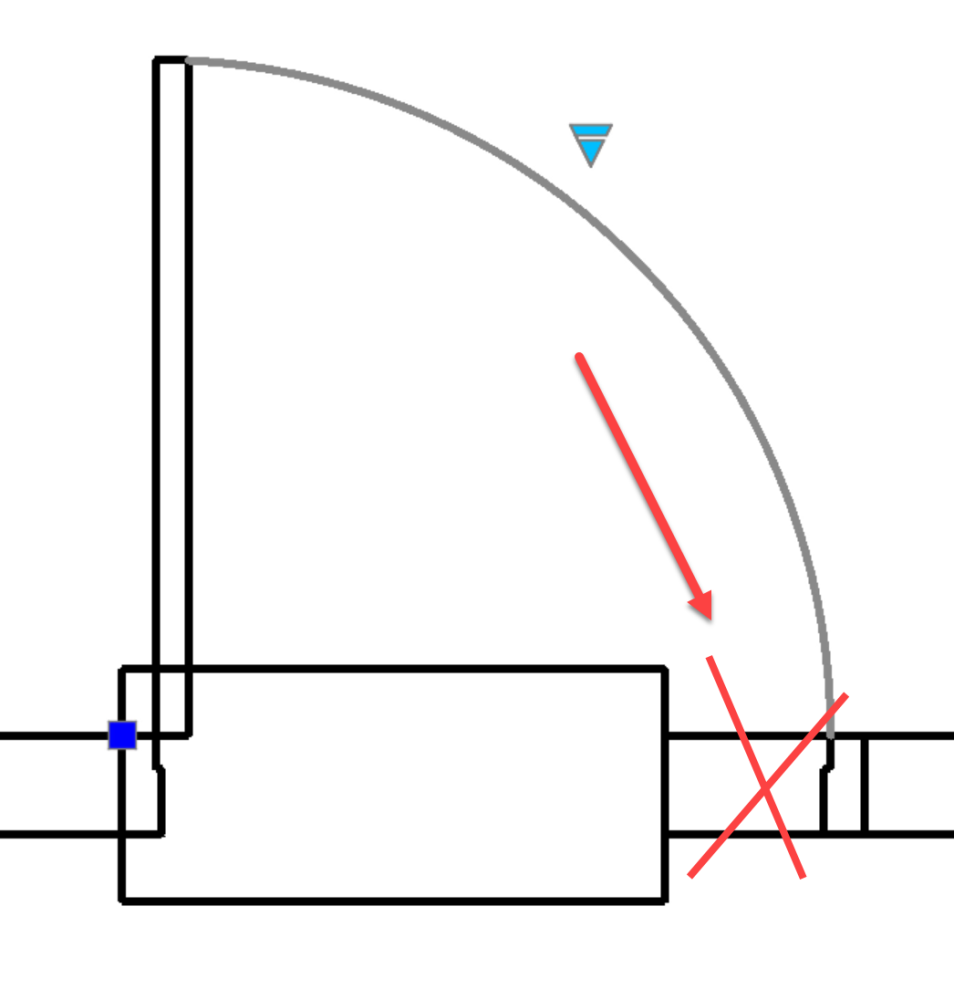
To do this, we use the element Mirror, which allows us to define a symmetry axis using two points. Then, under Activities, we must also select Mirror. Although both are called Mirror, they are actually two different things: one defines the behavior, while the other executes the action. We will explain the reason for this distinction in another tutorial. Once the activity has been selected, we need to choose the entities that will participate in the mirror operation. At this point, it is important to keep in mind that, in principle, we should include all the entities that make up the door.


However, you might decide to leave out the element Visibility, for example, if you prefer its grip to remain in the same position at all times. In this example, we also want the element Visibility to be mirrored together with the rest of the block.


Note: Remember to enable the display of all Visibility States before selecting the entities. This way, you can correctly include all the objects that need to participate in the action.


Now it’s time to create a mirror operation in the opposite direction.

For this, we will use the fixed side of the door as the reference. It is important to point out that, in a different scenario, if we needed to perform the mirror operation using the center of the door as the axis in the Y direction of our example, some additional issues would arise that we are not going to address in this video. The general logic would be similar, but the solution would have to be approached differently and would require some additional steps.

We will cover that specific case in another tutorial.

What did you think of this new tutorial? Were you familiar with this possibility?


This type of solution can be applied in many architectural situations. For example, we can use WIPEOUT with trees, vehicles, or other elements to automatically hide whatever is behind them, without the need to use Trim. It can also be useful in engineering when working with parts that need to be placed on top of one another.


Give it a try!


And remember that you can download ARES Commander and experiment with these features to create your own intelligent Custom Blocks. Download ARES Commander


https://www.graebert.com/cad-software/download/ares-commander/


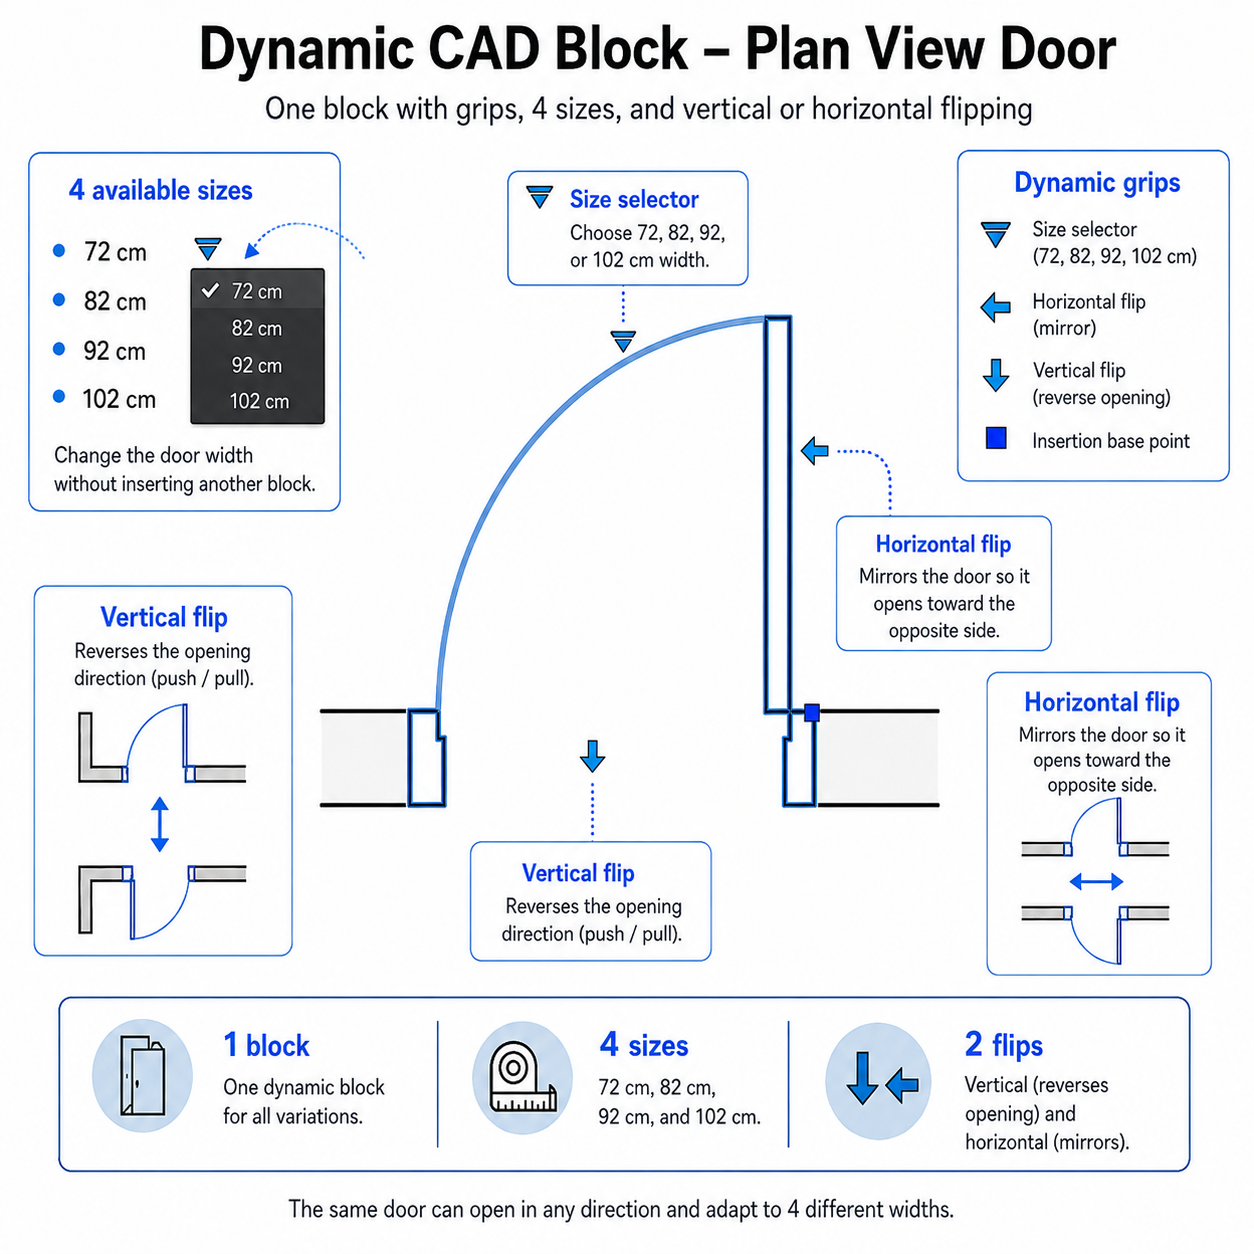
As you can see, this is an intelligent block whose behavior can be modified using different parameters and controls. In ARES Commander, this type of element is called a Custom Block, as it is in DraftSight, while in AutoCAD, it is known as a Dynamic Block.


Recent Posts

By Milton Chanes September 3, 2026
La gobernanza de la inteligencia artificial no consiste en frenar la innovación, sino en decidir qué puede hacer la IA, con qué límites y bajo qué responsabilidad.

By Milton Chanes September 1, 2026
From Conversation to Action: How to Govern Artificial Intelligence Agents
By Milton Chanes September 1, 2026
Descubre cómo funcionan los agentes de inteligencia artificial, desde ReAct y sistemas multiagente hasta MCP, A2A, seguridad, riesgos y aplicaciones reales.

By Milton Chanes August 25, 2026
MCP: The Infrastructure That Allows Artificial Intelligence to Connect with the Digital World
By Milton Chanes August 25, 2026
Discover what MCP is and why it could become a key infrastructure for connecting artificial intelligence with data, tools, applications, and agents.

By Milton Chanes August 25, 2026
Discover how AI agents are evolving from simple assistants into digital collaborators capable of automating tasks, coordinating processes, and transforming the way we work.
By Milton Chanes August 25, 2026
Descubre cómo los agentes de inteligencia artificial están transformando la automatización, la organización del trabajo y la colaboración entre personas y sistemas digitales.

By Milton Chanes August 25, 2026
AI Isn’t Coming to Take Your Job, but It Is Coming to Change How Many People Are Needed to Do It
Show More